
And on a budget!! You don’t need hundreds of dollars for micro dermabrasion treatments or expensive makeup and lotions just try these drugstore products and home remedies!
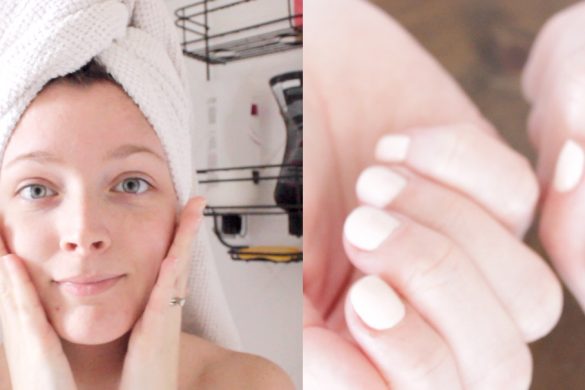
First things first! Scrub away that dead skin!
I have been doing the baking soda/water scrub on my face for about a month now. I do it 2 or 3 times a week and it has worked wonders. Before I use this I wash my face with a gentle natural cleanser ( I use Burt’s Bees Cream Cleanser). Then take a couple of tablespoons of baking soda and 1 tablespoon of water and mix it up until you have a paste like consistency. Scrub this all over your face and let it sit for a couple of minutes. I do this in the shower most of the time and I’ll let it sit while I shave my legs, wash up, etc. Other times I’ll take a bath and let it sit for a good five minutes and that’s when I get the best results. If you have any open blemishes it tends to sting a bit but stops stinging when you rinse it off. Rinse it well! You should now have brighter, more even toned skin!
After doing this scrub if you have dry skin you will need to apply lotion. I have oily skin so any type of lotion makes me break out. So what I do is I apply Burt’s Bees Day Cream around my eyes. I do this every time I wash my face. Whether I use the baking soda wash or not. It’s just a step in my daily routine that I have been doing for a few years and I hope it helps prevent wrinkles when the time comes:) Next I apply a chap stick on my lips and let my skin settle while I blow dry my hair.
By this time, since I have oily skin, I no longer feel like I have that tight, dry skin feeling and my skin is ready for makeup!
Fist step for makeup is this Maybelline DreamLumi Concealer in Ivory. You want your concealer to be at least one shade lighter then your skin to brighten the high points of your face and it will also conceal any blemishes. I put this on the inner corners of my eyes and blend it to the middle of my bottom lid. I also put this down the center of my nose, top of my cheek bones, top center of chin and cupids bow. I believe this is around 8.00. I got mine at Target.

Next I apply this tinted moisturizer type foundation in apricot. It has VERY light coverage and more or less just evens out your skin a bit and warms the tone of your skin as well! I got this on sale for 15.00 but normally retails for 20.00. Click the image for more info.

I dot this on my forehead, cheeks, chin, eye lids and a little on my neck and blend in like a lotion. Then let it set for a minute or two. It is such a light feeling product. It won’t feel like you have anything on your skin.
Once this has set I then apply my blush. Right now I am using an e.l.f. blush in the color “shy” that I ordered from www.eyeslipsface.com but you may be able to find this at target. It’s only 2.00! You can use any light pink blush of your choice as long as it’s not too powdery. A blush with a bit of sheen would work great also! I apply this to the apples of my cheeks and blend up my cheek bone to my hair line. I also blend it down my cheek because I feel my blush looks better on a larger area of my cheek with my face shape rather then a line of blush across the top of my cheek bone. Personal preference:)

Once I feel my blush is blended enough to look natural I add my highlight! My favorite part and I feel it’s the most important for that dewy look. I add a little bit more of the concealer to the top of my cheek bone and cupids bow if the tinted moisturizer covered it up and then I use this All Over Color Stick from e.l.f. in the color “Persimmon”. I got this at target for 1.00!

I rub some on my finger and blend it along the top of my cheekbones, swipe it down the top of my nose, cupids bow, center/top of chin, eyebrow bones, I put a little under my eyes and I dot some on the inner corner of my eyes. This will give you a glowing look. It may not make a huge difference when you are looking at yourself in your bathroom mirror but once you step outside or in certain lighting you will look like you are glowing!
This color stick is a bit “tacky” so be sure to do your eye shadow before applying this because any shadow that falls will stick to your cheekbones.

Natural Light
And now your look is complete! I have been doing this everyday this week, since I received my tinted moisturizer in the mail and I am loving this routine! It is so light feeling and looks so natural but evens your skin tone at the same time.

Indoor Lighting

Indoor Lighting
Enjoy!
![]()


7 comments
AWESOME!! LOOKS nice! 🙂
Thanks for all the excellent advise. I am going to try it with my daughter!
Great! Have fun!
This looks really nice. I love how many pictures you included in the review.
Wow! Your skin looks great! i have heard so much about this line! I am going to have top get some soon and give it a try!
Thank you! They carry some great products!
Hi there, everything is going well here and ofcourse
every one is sharing information, that’s really good, keep up writing.